Tampilkan postingan dengan label a. Tampilkan semua postingan

Selasa, 05 April 2016

I found a new woodworker on YouTube

This guy is my new woodworking hero! I cant wait until I have some free time to just sit there and watch all of his videos. http://www.youtube.com/user/lgosseuxdbois
Read More..

Let There Be Light Part III


This is part III of a III part series read parts I & II here.
I began working on the light ring stand at about 8:30 pm. It had to be completed that night, for in the morning it was to leave on a cross country drive. If that deadline wasn’t enough, it was also the first night of the newly resurrected #woodchat. Besides making the stand, I was tweeting and Google+ Hangouting for much of the night.To construct the base, I used a 1” thick, factory made sheet of finger jointed pine. I find that using sheets like this for non-decorative pieces is cost effective and the boards I rip from these sheets are much straighter than dimensional lumber would be.
The partially assembled light ring stand.
The entire stand is made from strips, about 2” thick, except for the upper half of each leg. As I ran out of the 1” think sheet and it was 10:30 at night by that point, I used the only dimensional lumber I had in the shop, pieces of 2”x4” Timberstrand to make the tops of the legs. Almost all of the joinery is made using T-nuts, 5/16” threaded rod and plastic knobs for easy breakdown. I set the T-nuts and install short pieces of threaded rod in each, secured with LocTite Threadlocker. Luckily, I had Ari around to cut the threaded rod lenghs for me while I fabricated the stand. The only permanently attached pieces are the receivers for the legs, where are permanently screwed to the feet.
The completed light ring stand with the light ring in place.
The stand is assembled with clamps as the LocTite was not yet dry.
When assembled, the stand is about 7’ high and can hold the light ring, centered at any height from about 3’6” to 6’9”. The light ring is simply placed against the upper legs of the stand and ring’s handles are clamped to the stand using small quick clamps.
To use the light ring, simply stand behind it, and take your photo through the ring, so that your subject is evenly illuminated on every side of the photo.
The stand, broken down and ready for travel.
Broken down, the stand is made of up 9 pieces, none longer than 4’. Though I didn’t have time to do so before the light ring and stand left of the west coast, I told Ari that if I picked up some large Velcro straps, it would make the stand easier to transport.
The light ring is now at home in LA, and its cooking with gas.
The light ring is now in LA, and soon it’ll be illuminating the stars.What odd projects have you made to meet your friend’s needs?
Let There Be Light: Part I
Let There Be Light: Part II
Read More..

Senin, 04 April 2016

Dylans Clock Stand

Last Saturday my son displayed his art in a show with his art class at the Central Park Zoo. It was a well received show and outside of heat, it was a wonderful day. My frame was actually well received, sloppy corners an all. Luckily though, I was able to make a second piece to help display his art and this one came out much nicer.
Dylans art show display
One of his three (3) dimensional projects was a clock. It’s a collage of clocks glued onto a box, with a round porthole cut out to reveal a clock face inside also.
Since the clock just sits on whatever you put it, I was asked to make a clock stand.
Initially I was going to make a low stand with ornate feet. As the deadline approached I was looking through The Complete Illustrated Guide to Furniture & Cabinet Construction. After thumbing through the section on feet and basically deciding on making a rounded base with mitered legs, I then flipped through the cabinet on stand section. I occurred to me that I could make a tall stand for the clock rather than a stubby one.
With that idea in my head, I went out to the shop and started milling legs and aprons. I was making a tiny shaker table to hold the clock.
Should I clean my table saw blade.
I won’t go into too much detail on the table, as there are many resources online for making a shaker end table (I’d personally recommend the Shaker End Table Woodwhisperer Guild Project).
The one thing that I was rather pleased about regarding the table construction was the mitered frame is used as a top to hold the Clock. After having issues cutting miters on my table saw with my Incra jig, I chose to make these on my miter saw. When I cut a test piece and held it against a japanese miter square I have, I was pleasantly surprised to find the miter saw was perfect. I cut all eight miter cuts on the miter saw and the frame came together 100% gap free.
The finished clock stand with the clock atop.
Perfect miters right off the miter saw.
Read More..

Minggu, 03 April 2016

And With This It Begins

The date and location for Woodworking in America 2013 has been set. For anyone who didn’t know:
The date was first teased on Twitter and confirmed on the Popular Woodworking Editor’s Blog the following day. It will be October 18th through 20th at the Northern Kentucky Convention Center in Covington, Kentucky (Greater Cincinnati). This is the same venue as WIA10, WIA11 and WIA12 MidWest. I’ve been to them all, and it’s a great venue with nearby hotels, a $1.00 trolley and a Hofbruahaus. I’ve alchoices had a good time there and I’m sure you will too.
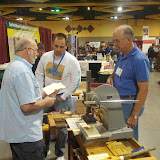
WIA 2012 MidWest: We came, we saw, we posed on Megans bench.
I’m not such a fan of the piecemeal approach to announcements that has been used for WIA lately (if there’s a date and venue, I’d like a ticket), but at least we can all block out our calendars now.
I’ll see you in Kentucky.
p.s. - There’s a White Castle.
Im at White Castle!
MWA Woodworking in America 2012 Midwest Photo Sharing Event
Read More..

Sabtu, 02 April 2016

Brooklyn Welcomes Lie Nielsen

This weekend the Lie-Nielsen Hand Tool Events are coming to Brooklyn. Theyll be at 3rd Ward (195 Morgan Ave, Brooklyn, NY 11237) on Friday, 1/4, from 10:00 to 6:00 and on Saturday, 1/5, from 10:00 to 5:00.
Tools for Working Wood will be there, and theyll be open.
In addition to their own wonderful wares, Lie-Nielsen will be bring some top notch tool makers to Brooklyn with them. Daed Toolworks, M.S. Bickford, Guarino Furniture Designs, Northwest Woodworking Studio & Tools For Working Wood will be at 3rd Ward too. In fact, rumor has it +Matthew Kenney (of +Fine Woodworking) will be there too.
What a pretty view in Brooklyn.
Im going to try to make it on Friday afternoon, but dont wait for me. Check out the show (and say hi to Matt).
3rd Ward
Read More..

Rabu, 30 Maret 2016

Sharpening a Scrub Plane Blade

The  scrub plane blade has an arc-profiled cutting edge, with  more or less  marked radius according to the job required. This profile makes it more difficult to sharpening by guides so many people prefer sharpening it by hand.
Im not very good at this job, so I searched for sharpening guides available that could serve the purpose. The Record 161 is a guide which is easy to find on ebayUK for few  pounds. It has only one central contact point (a rolling ball in the middle) and this permits to incline to the right and left allowing to follow the cutting edge profile easily.
The  blade is held firmly in place by a clamp screw that allows unrestricted iron orientation, useful even if it was necessary to sharpen skewed blade. The  dark side is that you have to ensure the correct blade position by hand.
For bigger curves the guide can be moved to the sides of the sharpening stone to allow for greater tilt, as seen in the short movie. The result was satisfactory with 35 ° bevel. To re-sharpen exactly to the same  angle Ill use a simple self made jig.
Read More..

A Bench For Me A Bench For You


It’s not quite that time of year again, but Marc’s pre-planning (a good thing with the coming little Spagnolo) his 2012 winter Guild Build already.This year he’s planning to help with your physical as well as educational woodworking fundamentals. That’s right . . .  we’re building a bench!
The Worlds Greatest Workbench.
I was working on a bench myself when I stopped to participate in this year’s Winter Guild Build: The Wall Hanging Cabinet.
Workbenchs have been a favorite topic of mine since first hearing Dave Noftz discuss them on his (sorely missed) Modern Woodshop. As Im sure is true for many of you also, its high time I got off my butt and built a proper bench. The support, encouragement and friendly rivalry of the guild is just what I need to get back to the bench. You should too.
My Timberstrand Bench Slab Experiment.
If youre bench obsessed like I am, heres a partial list of links worth checking out:Schwartz’s Rules for WorkbenchesMy cross postsChris cross postsMarc’s build or buy postKari’s joinery benchShannon’s joinery benchMorton’s Sourcing the LumberMy bench build postsHeres a blatant re-post of the video I took of Chris Schwarz discussing his Petite Roubo:
Dont forget about the +Modern Woodworkers Association Podcast. We talk woodworking with Guests from around the world of woodworking every other week. Subscribe to the RSS feed or iTunes today.
Read More..

Selasa, 29 Maret 2016

The Greene Greene Guild Blanket Chest

Right after the Tilt Top Table, Marc is back into a new Guild Build. This time well be making a Greene & Greene style Blanket Chest.
The SketchUp of the Greene & Greene Chest build.
I have a checkered history of Guild Builds, have participated in the Shaker End Table and the Hanging Wall Cabinet builds (sort of). Alas, sometimes live does get in the choice.
But dont let my busy schedule keep you achoice. The Guild Builds are a great choice to learn and build along with your friends. This will be a fun and practical project. Beautiful too. Build along.
Read More..

Senin, 28 Maret 2016

Thats Not A Petite Workbench This Is A Petite Workbench

With the coming of his newborn son, I for one suspect that Marcs Split Top Roubo bench build will fall behind schedule. I cant think of a better reason to delay a project. Along with the entire Woodworking Community Id like to wish Marc & Nicole the very best with their little bundle of joy.With the delay of the Split Top Roubo in mind, I set about building a smaller bench that Marc could use with his son. I ended up making two.
My Petite 21st Century & Petite Split Top Roubo Benches
The first is a Split Top Roubo, much as Marc plans to build. Only I made my petiter than Chris Schwarzs Petite Roubo.
If these benches dont do it for you, then join in with the Guild for the actual workbench build. Given that Marc has a newborn at home, I might actually keep up with him this time.
Read More..

Minggu, 27 Maret 2016

Moving Pictures of Woodworking In America 13

I never seem to leave Woodworking in America having taken enough media back with me. This year, though I took plenty of photos, I didnt take any videos (except for some silly Vines). Luckily, many others did take videos.
+Marc Spagnuolo took many great videos and after what Im sure was much more editing than I would like to do, he put together this great video on what he saw in Covington.
+Matt Vanderlist was paying much more attention in Roy Underhills Timber! class which opened the conference. He has this great video showing how Roy squares a log.
On Saturday in the marketplace I was lucky enough to be interviewed by Lee Valley Tools. Connie from their social media team talked with many bloggers and some actual talented wood workers and tool makers. I believe there will be a few videos coming out in the coming weeks. This first one covers what the interviewees would teach kids first. I cant say mine is the best answer (it isnt) but there clearly are some wood workers with a great grasp on how to bring the young into the craft.
Of the silly Vines I shot, here is my favorite. Ive already shared it and Im sorry if youve already seen it. I just cant help buy laugh every time I watch.
Dont forget about the +Modern Woodworkers Association Podcast. We talk woodworking with Guests from around the world of woodworking every other week. Subscribe to the RSS feed or iTunes today.
Read More..

The Ultimate Workbench

Last October, immediately following Woodworking in America (and some goading from Aaron Marshall) I began my bench build in earnest. I took the front-to-back stretcher panels I had previously made and begain to re-design around them. I also switched my intended front vice from a Veritas Twin-Screw to a leg vise. In order to make the leg vise, I bought a Lee Valley tail vise screw and an 8” cast iron handwheel from Grizzly. It took them both to a machinist I know and viola! They fit and work together.
Then it got cold and I put the bench achoice for the winter so that I could insulate the shop.
I’ve been working on the insulation since early November and my shop has been pressed against the non-opened up wall since then. In that time I’ve completely re-wired the shop and brought outside wall to R-40.
The Lee Valley Tail Vise Screw
The shop wall, today.
I’ve also learned that I can be productive without a fancy pants bench. In fact, when I was walking through Home Depot recently, I found an American made beauty of a bench and bought it on the spot.Why did I buy it? Many reasons. It beats all the shop made and high end benches I’ve ever seen on so many levels.
  • No futzing with those hard to make mortise and tenon joints. This bench is even stronger with butt joints reinforced with two (2) cheap screws.
I dare you to find stronger, simpler joinery.
  • A square edge for clamping and referencing? Not on this bad boy. The top has been rounded so that even silky smooth woodworker hands will love to caress it.
No splinters from that beautiful edge
  • Does that big twin-screw of leg vise get in the choice, alchoices banging your thigh as you walk past your bench? Well who needs it? One of the most wonderful parts of this bench is that it pares down all the clutter of modern benches to the pure functional core. That’s why you’ll not find a face or end vise on this gem. Your thighs will thank you.
  • The bench as a 3 dimensional clamping surface? Really? Who needs to clamp in 3 dimensions? Wood is only 2 dimensional, and so is my clamping. That’s why this bench is so great. Having its legs set back from the front apron and it’s leg attachment bolts set proude of the front apron make it virtually impossible to clamp to the front face.
Inset legs and proud bolts prevent the user from making any
face clamping mistakes.
  • Apparently, heavy benches are all the rage these days with bench evangelists like Chris Schwarz talking up the benefits of a massive bench with a thick (but not too thick) top. Needing a massive bench is the oldest old wives tale in the woodworking book. All you need to do for any bench is stand on it while working and it won’t move an inch.
No stupidly thick and complicated top here!
  • Deal with a complicated bench top glue up to only follow it by flattening the top by hand? Not with this beauty. A single piece of good old fashioned ¾” OSB is all the top you need. It comes dead flat from factory. In fact, just about the only choice to warp this top would be to stand on it.
  • Are the pieces you build too big? Not with this bench. The convenient rear lip prevents pieces from hanging over the back. No longer will you be building those hideous, gianormous chests of drawers and tables.
There rear lip is so awesome, it intimidated the camera so much
the photo came out  blurry.
So now that my bench saga is done, I couldn’t be happier. I ended up with the perfect bench, it only took minutes to assemble and I only spend $70.00 on the whole thing.
Behold the majestic beauty.
Now, what should my next project be? Maybe I’ll pick up a laser guided circular saw and make some decorative boxes.
Edit: The original post date was 4/1/12.
Read More..

Sabtu, 26 Maret 2016

I made some progress on the ice chest cooler box today and posted a new vlog about it