Last October, immediately following Woodworking in America (and some goading from Aaron Marshall) I began my bench build in earnest. I took the front-to-back stretcher panels I had previously made and begain to re-design around them. I also switched my intended front vice from a Veritas Twin-Screw to a leg vise. In order to make the leg vise, I bought a Lee Valley tail vise screw and an 8” cast iron handwheel from Grizzly. It took them both to a machinist I know and viola! They fit and work together.
I’ve also learned that I can be productive without a fancy pants bench. In fact, when I was walking through Home Depot recently, I found an American made beauty of a bench and bought it on the spot.Why did I buy it? Many reasons. It beats all the shop made and high end benches I’ve ever seen on so many levels.
So now that my bench saga is done, I couldn’t be happier. I ended up with the perfect bench, it only took minutes to assemble and I only spend $70.00 on the whole thing.
Now, what should my next project be? Maybe I’ll pick up a laser guided circular saw and make some decorative boxes.


 |
| The Lee Valley Tail Vise Screw |
 |
| The shop wall, today. |
- No futzing with those hard to make mortise and tenon joints. This bench is even stronger with butt joints reinforced with two (2) cheap screws.
 |
| I dare you to find stronger, simpler joinery. |
- A square edge for clamping and referencing? Not on this bad boy. The top has been rounded so that even silky smooth woodworker hands will love to caress it.
 |
| No splinters from that beautiful edge |
- Does that big twin-screw of leg vise get in the choice, alchoices banging your thigh as you walk past your bench? Well who needs it? One of the most wonderful parts of this bench is that it pares down all the clutter of modern benches to the pure functional core. That’s why you’ll not find a face or end vise on this gem. Your thighs will thank you.
- The bench as a 3 dimensional clamping surface? Really? Who needs to clamp in 3 dimensions? Wood is only 2 dimensional, and so is my clamping. That’s why this bench is so great. Having its legs set back from the front apron and it’s leg attachment bolts set proude of the front apron make it virtually impossible to clamp to the front face.
 |
| Inset legs and proud bolts prevent the user from making any face clamping mistakes. |
- Apparently, heavy benches are all the rage these days with bench evangelists like Chris Schwarz talking up the benefits of a massive bench with a thick (but not too thick) top. Needing a massive bench is the oldest old wives tale in the woodworking book. All you need to do for any bench is stand on it while working and it won’t move an inch.
 |
| No stupidly thick and complicated top here! |
- Deal with a complicated bench top glue up to only follow it by flattening the top by hand? Not with this beauty. A single piece of good old fashioned ¾” OSB is all the top you need. It comes dead flat from factory. In fact, just about the only choice to warp this top would be to stand on it.
- Are the pieces you build too big? Not with this bench. The convenient rear lip prevents pieces from hanging over the back. No longer will you be building those hideous, gianormous chests of drawers and tables.
 |
| There rear lip is so awesome, it intimidated the camera so much the photo came out blurry. |
 |
| Behold the majestic beauty. |
Edit: The original post date was 4/1/12.
Read More..
Kamis, 17 Maret 2016
2013 August Shop Tour
This months shop tour is a bit late, but thats because I got so much done before the since the last tour (and started August with a vacation.
Here we go.
Read More..
Here we go.
Selasa, 15 Maret 2016
Power Tools Need a Bench Too
I love benches. I’ve ranted here before about how much I like them, I’ve written essays about my bench design ethic and I’ve been very excited that this winter’s Guild Build is a bench.Though my favored designs usually lean towards the Rouboesque and I’m a big believer in Chris Schwarz’s “the legs should be flush with the front edge” rule, I’ll freely admit that there is no right bench for everyone.Lately, I’ve been reading and re-reading John White’s article on his Wired Workbench from Fine Woodworking. It’s not what I would typically think of when a Workbench is mentioned, but the more I look at this bench for power tools, the more I like it.It incorporates very efficient (and cost effective) clamping, integrated dust control and holds the cords and hoses out of the choice (similar to my boom arm). I think it makes for a very functional power tool bench. I’m very temped to build one myself once I’m done with the Clockwork Workbench, but alas I have no room. Luckily my Dad’s shop is roughly the size of my house, so maybe he’ll make one.
I was hoping to embed the video here, but all Ive been able to do is link to it. Check it out on the Fine Woodworking site. So that Im not without image, heres a photo:
If that bench has wet your appetite, here are a few more recent blog posts about workbenches.Chris’s bench design essay I & II.Kari has a recent post about the benches of WIA11.Marc is building a split top Roubo with the Wood Whisperer Guild.Vic is posting all the time about his Split Top Guild Bench build.Shannon’s now classic Roubo build.Schwarz’s Petite Roubo Talk.My Petite Workbenches.Marc’s build or buy postKari’s joinery benchShannon’s joinery benchMorton’s Sourcing the LumberMy bench build postsI’m sure I’ve missed many a good post, so if you have a post about a work bench, or know of one, please share it in the comments.
Read More..
Kamis, 18 Februari 2016
Power In The Shop Only 5 Years Late
Long time readers may remember some of these photos.
It was in the summer of 2008 that I ripped out the sheet rock, insulation and electric from my shop. Though I had every intention of replacing them all quickly, it was not to be. For years I suffered through a shop that had no insulation and almost no electric. My only shop outlet was a single 15 amp outlet on a circuit shared with the shop lights and the hall in the house.
As the removal of the insulation and electric was part of the first phase of my siding project, their replacement languished as the siding project devolved into a multi-year odyssey. It was my friend, +Aaron Marshall, who finally brought me back to the insulation and electric.
Woodworking in America 2011 occurred during the early days of the Wood Whisperer Guild Split-Top Roubo project. Aaron and I were excited about it and talking about workbenches. I explained to Aaron my intention to build a Roubo/21st Century Workbench hybrid from LVL’s and Timberstrand. Though the great hardware available from the WIA vendors was tempting, Aaron convinced me to make even that from LVL and make my own leg vise.
I left WIA excited about my bench and proceeded to begin work on it right achoice. I had finished the leg vise design by the time the temperature dipped - that’s when I knew the bench had to wait and I began rebuilding the wall.
 |
| My absolute favorite drill for roughing in electrical work. |
Though the rough in of the electric was the first phase, most of the electrical work had to wait until the walls were insulated and sheathed. The insulating work began just after Christmas 2011 and by April of 2012, I was able to begin sheathing the walls. Finally, by April of 2013, the insulation and sheathing work were done and I was able to begin wiring outlets.
 |
| Ready for sheathing. |
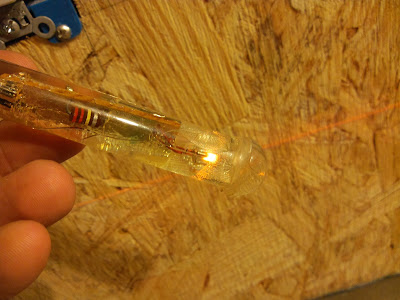
I completed the wiring of the 110V outlets on July 10, 2013. After thinking I was done, finding one I forgot, installing it and then connecting a ground that I’d failed to connect, all of the outlets were live and wired properly. I was even able to use the power detector I made in 7th grade technology to test the outlets.
 |
| Theres Power! |
Next time I’m in the shop I won’t be swapping plugs to switch tools or blindly feeling for the circuit breaker when the table saw or planer trips the fuse and the lights go out. I now have 3 dedicated 20V circuits with 16 double gang boxes and one single gang box to choose from.
 |
| So many nice outlets . . . |
