skip to main |
skip to sidebar
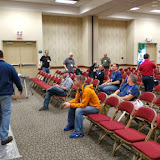
This weekend the Lie-Nielsen Hand Tool Events are coming to Brooklyn. Theyll be at 3rd Ward (195 Morgan Ave, Brooklyn, NY 11237) on Friday, 1/4, from 10:00 to 6:00 and on Saturday, 1/5, from 10:00 to 5:00.
 |
Tools for Working Wood will be there, and theyll be open. |
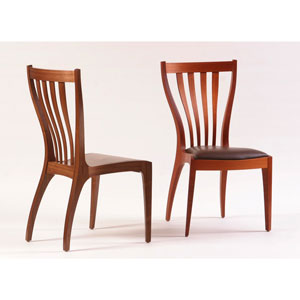
In addition to their own wonderful wares, Lie-Nielsen will be bring some top notch tool makers to Brooklyn with them. Daed Toolworks, M.S. Bickford, Guarino Furniture Designs, Northwest Woodworking Studio & Tools For Working Wood will be at 3rd Ward too. In fact, rumor has it +Matthew Kenney (of +Fine Woodworking) will be there too.
 |
What a pretty view in Brooklyn. |
Im going to try to make it on Friday afternoon, but dont wait for me. Check out the show (and say hi to Matt).
3rd WardView Larger Map
Read More..
Meeting people is the best part of any Woodworking in America. This past year I had the pleasure of meeting Craig Ursell of Affinity Tool Works. Affinity Tool Works represents the Tormek, Bora, Dtec Diamond Blades, Footprint Tools, Lynx, Pax and Fish Drill Bit brands. At Woodworking in America, Craig and his staff were showing off the Tormek sharpening system. |
The Tormek display at Woodworking in America (thats not Craig, Im sorry I forget who that is). |
After Woodworking in America, Craig sent me a 50 Bora Clamp Edge Wide Track to try out. |
The Bora Clamp Edge Wide Track |
Like the standard Clamp Edge, the Clamp Edge Wide Track works as a straight edge clamping tool. Its designed to be used as a fence that clamps onto the workpiece. Then just about any cutting tool can be run along the Clamp Edge to create a perfectly straight line. The Clamp Edge Wide Track goes a bit further though, in that it adds T-tracks that accept ¼ x 20 bolt heads so that jigs and other accessories (such as the Bora Saw Guide) can be attached. Both the standard Clamp Edge and the Clamp Edge Wide Track have pivoting clamping heads that allow them to be clamped to a workpiece at anything from a 0º to 22.5º angle relative to perpendicular from the edge of the piece. |
These T-tracks allow Bora and shop made accessories to be used with the Clamp Edge Wide Track. |
I put the Clamp Edge Wide Track to work on a few projects. I used it as a guide for cutting Lexan for the window well cover I recently made. Though not exactly what Bora had in mind, the Clamp Edge Wide Track workled very well for this task of guiding a utility knife. The only trick was to place a piece of wood underneath the Lexan before clamping it, as the Lexan sheet itself was too thin and flexible for the Clamp Edge Wide Track to properly bite too. |
Cutting this Lexan sheet, the Clamp Edge Wide Track was a great help. |
I also used the Clamp Edge Wide Track as a stop for setting the fences on jigs I was making. While working on the Tin Can Caddies I had to make a jig for holding the side pieces as I used the hole saw to make the can holes. The Clamp Edge Wide Track worked wonderfully for this, allowing me to set the Clamp Edge on the line, then just hold the wooden fence tight to the Clamp Edge while I screwed it in, without having to worry about watching the line and trying to keep the wooden fence perfectly set on the line while it was being screwed in. |
The stacks of wood are to become a fence screwed to the sheet of MDF. I used the Clamp Edge Wide Track to align the fence as I assembled this jig. |
As the Clamp Edge Wide Track clamped tight enough to be used as a fence setting reference edge without shifting, Im sure it can easily handle the force of having a saw or router pushed against it to ensure a straight cut. It is certainly in this role, as a straight edge to guide a cutting tool, that the Clamp Edge Wide Track excels. It is straight & stiff and quicker & easier to install than any guide rail, short of one for a dedicated track saw.It is also in this role as a cutting tool guide that I have used it the least. For you see, I already owned a track saw. Any discussion of the Clamp Edge Wide Track would be remiss if it didnt mention track saws. |
Once the adjustable head is moved snug with the piece your clamping to, just through this large handle and the Clamp Edge Wide Track grips the wood tenaciously. |
If ease of use & speed are the determining factors, track saws win out by a hair. However, if cost is included in the comparison, the Clamp Edge Wide Track is the much better value. For only $56.00 (amazon.com for the 50" model) plus a saw you already own, the Clamp Edge Wide Track will quickly & cheaply make your saw cuts much straighter.Overall, the Clamp Edge Wide Track is a great clamp-on straight edge and a great value. If you already have a track saw, it may take a little while to see its non-saw guiding value, but it is there. If you dont have a track saw, the Clamp Edge Wide Track will immediately be of tremendous use. Thanks Craig for letting my try out the Clamp Edge Wide Track. Itll continue to see plenty of use in my shop.
Read More..
This episode was too good not to re-post.Modern Woodworkers Association Podcast 40.
Show Notes:
The 40th edition of the Modern Woodworkers Association online discussion about all things woodworking. Todays special guest is Roy Underhill. Before we get to him, let me introduce our usual panel. Im Tom Iovino of Toms Workbench dot com, and Ill be your host for this program.
Whats in the shop?
Blog post that piqued our interest
Goings on in the MWA
Roy Underhill
Next broadcasts topic
If you go to modernwoodworkersassociation.com there is a donate button on the upper right side. Please give what you can. Well thank you on the air and well make sure that everything we receive goes towards making the show better.
If youre missing us already, you can subscribe to the show on itunes. Just search for the Modern Woodworkers Association. Once youre subscribed, youll be sure never to miss an exciting episode. While youre in iTunes, please leave us a 5 star rating. It helps our rank so others can more easily find us.
If you want to find out more about the Modern Woodworkers Association, be sure to visit modernwoodworkersassociation.com, follow the MWA on twitter @MWA_National, like the MWA on Facebook or circle Modern Woodworkers Association on Google+. While youre there, join the MWA Google+ community for project sharing, discussion and loads of woodworking banter.
Read More..
Woodworking in America 2012 Midwest was filled with banter about the awesomeness of Chuck Norris. While it doesnt take much for a bunch of (mostly) guys hanging out for a weekend to start talking about Chuck Norris, the catalyst for the discussion in Covington was clear. There was an even more powerful Chuck in convention center with us: Chuck Bender. |
Chuck Bender chatting with our very own, Tom Iovino at WIA |
Chuck Bender is the proprietor of the Acanthus Workshop and the host of the No BS Online Woodworking Show. Chucks also a regular at Woodworking in America at many other woodworking shows and seminars around the country and especially the northeast (I cant think of the last time I went to a show and Chuck wasnt there).At Woodworking in America I was able to attend Chucks How To Cut Fancy Pants Bermuda Dovetails Like A Man seminar. Apparently, as there was nothing to do in Bermuda except drink, have sex and work wood, amusement for the natives came in the form of decorative patterns cut into their exposed dovetails. |
Chuck cuts Dovetails in class |
Chuck took us through the basics of cutting dovetails his choice, the choice, and then we moved on to the Bermuda Dovetails. After learning the technique, Ill say that Bermuda Dovetails are not as hard as they look, but theyre still pretty hard. If the aesthetic peaks your interest, you should probably pick up Chucks Dovetail DVDs, as theyll give you the opportunity to watch over and over as you practice. |
A sample set of Chucks Bermuda Dovetails. |
I must warn you, before you run out and learn to Dovetail as Chuck Bender does, you must consider the great responsibility that comes with such great power. It has been hard to watch the great Chuck Norris cope with the responsibility his power brings. If you learn to cut your pins and tails first like Chuck Bender does, youll become one of the few who are even more powerful than Chuck Norris. Consider that, and tread carefully.
Read More..
When I first posted about the videos from WIA, Lee Valley had just released their first and I included it.
They have just released their second, video from the conference. This time, find out what we all made as a first project.
Dont forget about the +Modern Woodworkers Association Podcast. We talk woodworking with Guests from around the world of woodworking every other week. Subscribe to the RSS feed or iTunes today.
Read More..
Dont forget about the +Modern Woodworkers Association Podcast. We talk woodworking with Guests from around the world of woodworking every other week. Subscribe to the RSS feed or iTunes today.
Read More..
Last year at Woodworking in America, I took far too few photos. This year I managed to take a whole lot more. Though I still think I may not have taken enough, here are the photos Ive taken.
Some of these folders only contain a few images, but hopefully they convey the great time we had at WIA11.
Woodworking in America 2011 Photos:Blogger Community Party
The Maloof Leg-to-Seat Joint w/ Charles Brock
WIA Marketplace
Hand Tool Olympics

Secrete Drawers & Hidden Compartments w/ Charles Brock

Nailed Furniture of the 18th Century w/ Adam Cherubini

Hofbrauhaus
Rabbets, Dadoes & Grooves by Hand w/ Adam Cherubini
Tradition Improved Lie-Nielsen Toolworks w/ Thomas Lie-Nielsen
Chisels Through Ancient Eyes w/ Adam Cherubini
Blue Shirts
Embassy Suites Happy Hour
Pompilio
Behle Street Cafe
Rob Bois, Woodworking Underwear Model & Bad Axe Tenon Saw Winner
Read More..
On Monday +Lee Valley Tools released their latest video from Woodworking in America. This one it titled,
Whats The One Thing Youve Alchoices Wanted To Make? While I was initially disappointed I didnt make the video (Im in the two previous WIA videos), I realized it likely had to do with my project.
Making a chair seemed to be listed by about half those interviewed. Frankly, everyone else had a better description or explanation than I did.
It remains though - I do want to make a chair. Since reading Jeff Millers Chairmaking and Design over the summer Ive had building a chair stuck in my head.
In an attempt to nurture that chair Ive attended wonderful chair classes with Ejler Hjorth-Westh at WIA and even traveled to Atlanta to attend a class on chairmaking with Jeff himself.
Now all I need to do is decide on a design and get to work. While the chair supposed to be a 2013 project, I am closer and more ready than Ive ever been. By the end of 2014 I should be able to write these posts form the comfort of my own chair.
Dont forget about the +Modern Woodworkers Association Podcast. We talk woodworking with Guests from around the world of woodworking every other week. Subscribe to the RSS feed or iTunes today.
Read More..
Well after waiting for what seems like months, sending several emails regarding UK availability and keeping a close eye on the Lost Art Press website & blog and finally monitoring stock levels of it on Axminster Tools, its finally mine - At Last!!!
The Anarchist Toolchest by Chris Schwarz - The Modern Day Godfather of hand tool woodworking.
I cant wait to get stuck into this book and I will do my best NOT to review it, as it seems the whole woodworking world and his wife has already done so...
So what else have I been spending money on ...
Just a few stocking fillers from Axminster Tools - not that I wear stockings...
- 2x Large Old fashioned Carpenters Hand Screws
- Veritas Card Scraper set of 4
- Veritas Gimlet set of 7
- Kirschen Burnisher to sharpen the Cabinet Scrapers
- Crown Adjustable Square
- 12" Center Finding Rule
I also purchased a set of 6" and 4" dividers on Ebay. These dividers have a more reliable screw adjustment. I was given my current pair which are from an old trigonometry set that move while in use, unless you are extremely careful with them.
Aside from a few luxury items, I should be able to control my hand tool fetish for a while - at least until I have read about the 50 essential tools in the Anarchist Toolchest...
Read More..
Buying used books on amazon has been a great choice to expand your library. Since last summer Ive been using it to expand my design library. For as little as $5.00 per book (with shipping) Im able to pick up used copies of books ranging from Fine Woodworking to Sam Maloof to Jeff Miller on Amazon.
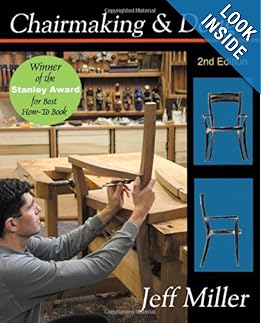
You need this book. Its fantastic. |
It was an low used price which first led me to buy Jeff Millers Chairmaking & Design book. When I bought it, I cant say I had too much interest in chair making, but it was reviewed well and was quite affordable.
Once it arrived, I knew it was a masterwork when I first flipped through it at my office. Now, having read it I know its a brilliant reference and instructional guide for beginning chair makers. It has been my goal to make a chair this year, and Jeff Millers book is the reason.
 |
My finished version of the Jeff Miller Benchtop Bench. |
When I was researching designs for benchtop benches before Fathers Day, I ran across Jeff Millers Benchtop Bench and ended up making a version for my Dad as a Fathers Day gift. After Chairmaking & Design the Benchtop Bench cement Jeff Miller as a master of instructional woodworking. His work has made him a master of woodworking itself.
Given my esteem of Jeff, it was with great excitement that I learned he would be teaching a class, Designing and Building Chairs with Jeff Miller, at Highland Woodworking. When I realized that the class was only two (2) days, on a weekend and only $195.00 I immediately signed up.
 |
These are some of Millers wonderful Chairs to be discussed in the class. |
The added bonus for me is that it means Ill be making my first trip to Atlanta where Ill not only get to experience Highland Woodworking first hand, Ill also get to hang out with my good friends of the Atlanta Modern Woodworkers Association (some of which have been kind enough to put me up for the weekend).
There are only 25 spots available for the class, and Im not sure how many are left or how long theyll last, but if youre anything like me, this class will scratch many woodworking itches and should provide a wonderful weekend with a knowledgeable instructor and good friends. I cant think of a better choice to enjoy my first formal woodworking class.Dont forget about the +Modern Woodworkers Association Podcast. We talk woodworking with Guests from around the world of woodworking every other week. Subscribe to the RSS feed or iTunes today.
Read More..
A few weekends ago I was lucky enough to attend the Lie-Nielsen Hand Tool Event they Hosted at the 3rd Ward in Brooklyn. I was able to talk tools and woodworking with many old friends and I made some new ones too. An old friend I met there was Matt Kenney of Fine Woodworking. Matt was there for the magazine. He spent his time working behind a bench and chatting with people as they came by. |
Matt chats with an attendee while cutting dovetails. |
Apparently, after I left Matt was called out for Cheating by an event attendee. For, Matt had committed the infraction of using a paring guide while cleaning out the baseline of the tails he was cutting.Cheating? No. As Matt told the event attendees, Theres no such thing as cheating in Woodworking. He does a great job of elaborating his point in a blog entry on the Fine Woodworking site. |
Caught, red handed. |
Cheating? Really? I dont get the commenter. What makes woodworking so wonderful is that theres no right choice to do anything. From how we cut a dovetail to what joinery method we choose in the first place, there are almost as many choices to accomplish the task as there are woodworkers. Id hate to hear what the commenter would say of my drawers, jointed with 5 mm Dominos. And yet, they somehow work wonderfully.Thankfully, its not just me and Matt who think this of woodworking. From Todd Clippinger sharpening his scrapers with just a file to Shannon Rogers making everything by hand there is no correlation between the method a woodworker chooses and the results. Just practice the method with care and skill, and the results will be a wonderful piece.Want to see Todd cheat? Check out how he sharpens his card scraper. Do you folk cheat?
Read More..
With the steps and legs joined I turned my attention to the stretchers.
 |
The legs are glued to the steps. |
The stretchers are made from the 1" thick stock I milled for the steps and legs during the milling process. I began by ripping two (2) pieces to about 1¼ width.
Next I took two (2) scrap pieces and cut them to be the exact length between the sides, where the sides meet the steps. I fit these pieces between the legs at the base of the stool in order to hold them parallel (they were angled in, so the legs held the spacers under compression without clamps).
With the legs held parallel by the spacers, I used an adjustable square to mark up from the bottom evenly on both legs. I didnt go for a particular measurement. I aimed for about 1/3 of the choice up. The square ensured that the marks on both legs were even with each other. I followed the same process to mark out for the back stretcher, making it about 1½ higher (by eye) than the front stretcher.
The stretcher blanks were laid across the legs, with the bottom edge of the stretchers even with my marks. Then I marked the top of the stretcher on the legs and the inside and outside of the legs on the stretchers. I cut the stretchers to length at the outside edge of the leg marks. Then I used a bevel gauge and laid out a single tail on each end, extending from the inside leg mark to the end of the stretcher. I cut down the side of the tail with my dovetail saw, then I scored the shoulder line with a chisel and cut it with the saw too.
 |
The "pins". |
Once the tails were cut, I laid the stretchers back down in place on the legs and marked the pins (its really just a single negative tail, but for the sake of clarity, Ill call it the pins). The sides of the pins were cut with my dovetail saw and I chiseled out down to the base.
Hand cutting dovetails is not an operation I do often, so their fit was gappy. It was nothing a little epoxy wouldnt fix later.
 |
Not the prettiest, but itll do. |
As I had done with the steps and legs, I took the stretchers to the router table and rounded over the edges that I would not be able to reach once the step stool was assembled. Then I glued in the stretchers with NexaBond. Actually, I installed the front stretcher before I remembered I should have rounded it over. This left me more work to do with the rasp and resulted in the back edge not being as evenly rounded as the others. Be sure to round over your unreachable edges before assembly.
For previous Step Stool posts, click here.
Dont forget about the +Modern Woodworkers Association Podcast. We talk woodworking with Guests from around the world of woodworking every other week. Subscribe to the RSS feed or iTunes today.
Read More..