Tampilkan postingan dengan label step. Tampilkan semua postingan

Minggu, 03 April 2016

Stephens Step Stool Part V

With the entire step stool now glued up I realized I hadn’t cut feet yet. I took my Lee Valley Drawing Bow and marked out a subtle curve in the middle of each leg. Once I cut out the curve with a jig saw, it left two (2) feet on each leg.
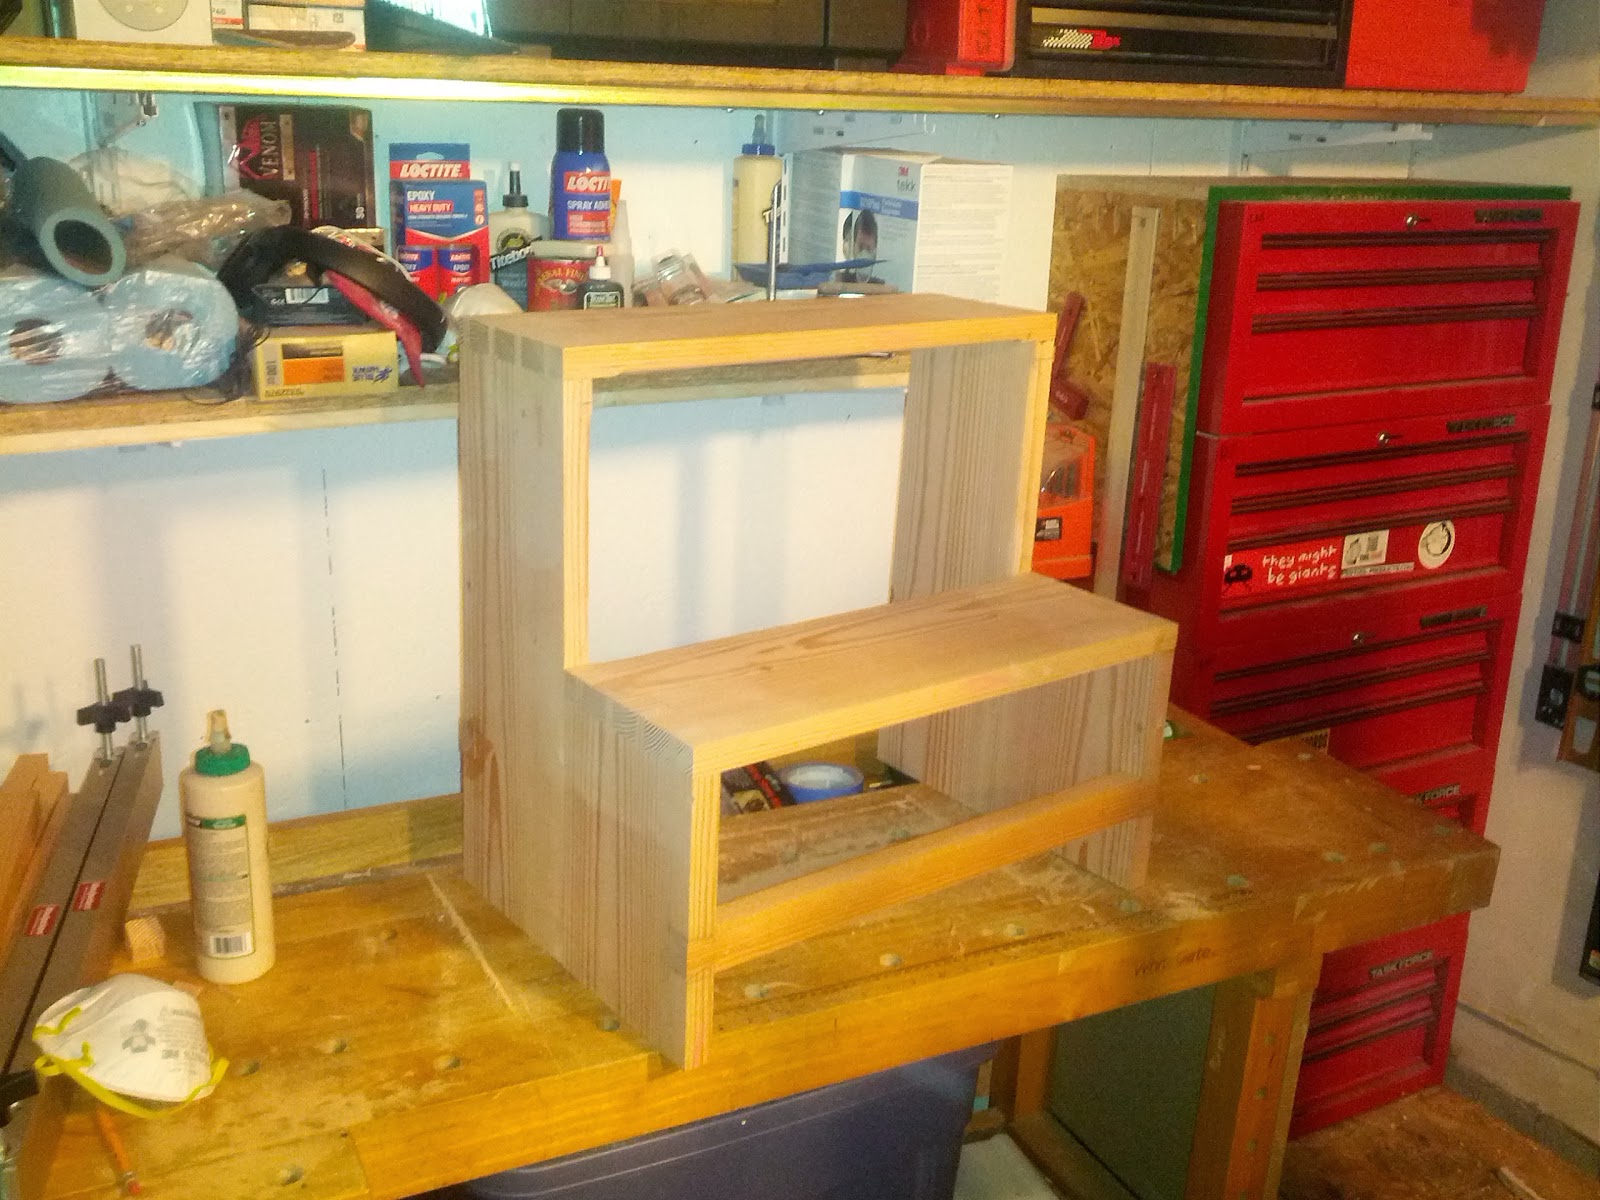
All ready for  feet.
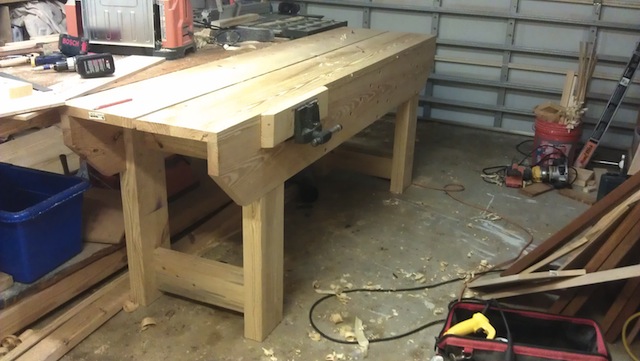
Now with feet I took the step stool over to my router table. After the nasty incident with my neighbor during this stage of my last project, I setup my router table inside this time.
I removed the fence and used a bearing guided ¼” radius roundover bit, I ran every reachable edge of the stool (except the bottom) over it. This method took a bit of getting used too. With a bit of practice I soon found it easy as the stool is not so big as to hang completely off the router table yet is big enough to provide plenty of reference and holding surface.
Its starting to look curved.
Fresh off the router table the stool (or any piece having this roundover method used) is rounded, but not done. The routed curves on the edges are hard, disjointed and where they do flow into each other they have a shallow, machine cut look. I only use the router to hog off most of the waste, not to provide my final edges. After routing it is time for rasping.
My arsenal (and some additional).
As I’ve grown to enjoy the process and results of using rasps, my collection of rasps has grown. As I’ve used them more and more, favorites have emerged and others have fallen out of use. On Stephen’s Step Stool I did all my initial rasping using my Shinto 9” rasp. Though amazingly cheap, the woven blade is exceptional at coarse and medium rasping with efficient chip removal. Unlike other cheap rasps I’ve used, the Shinto does not leave tooth tracks (due to the woven blade).
The Shinto is wonderful at coarse work.
Next I used my Auriou #9 Cabinet Makers rasp. The Auriou further refines the curves while taking the coarse surface left by the Shinto and smoothing it to a much more consistent surface. Finally I used my new Gramercy 5” 25 tpi cabinet makers rasp. This Gramercy is delightfully light and leaves a very smooth surface (for a rasp).
With all the rasp work I do my goal is to further refine and flair the curves. I want them be organic, flowing and invite touch.
As transformative as the rasps are, even fine rasps leave a surface too coarse for finish. When I’m done with the rasps I switch to my Rotex sanders. I use an RO 125 and an RO 90. When setup on Rotex mode with an 80 or 120 grit sanding pad and set to speed 1, they do a wonderful job of removing the rasping marks. They also use the Festool Interface pads which allow the sanders to wrap the rounded edges and prevent flattening.
Gaps? What gaps?
After sanding the curved edges I added blue Transtint dye to 5-minute epoxy and filled in the few big gaps in the dovetails. Once the epoxy was dry I took out the sanders again, this time sanding the entire stool. I currently sand up through 220 grit, though I’m not completely satisfied with my sanding results. I’m not sure what changes I’ll make, but I’m considering going much higher in grit.Find all of the Step Stool posts here.
Dont forget about the +Modern Woodworkers Association Podcast. We talk woodworking with Guests from around the world of woodworking every other week. Subscribe to the RSS feed or iTunes today.
Read More..

Jumat, 25 Maret 2016

Wont Your Fireplace Be Jealous

The start of the year had come and gone with nary a word from the Furniture Project. Typically the promotion of their traditional February event begins in the fall. The lack of information this year had me wondering if the event would continue (and hoping for the best). Though it didnt make it to air, I even had the question "whats up with the 2014 Furniture Project?" in the show notes for the most recent Modern Woodworkers Association podcast.
My friend, Rusty, with his stool from the 2012 Furniture Project
Then, as if in answer to my question, the Furniture Project tweeted this teaser on Friday:
Read More..

Senin, 21 Maret 2016

MWA Podcast 45 Tom Fidgen

This originally posted on modernwoodworkersassociation.com?

? Show Notes:
  • Main topic
    • Tom Fidgen
      • How did you get into woodworking
        • Start with power tools and move to hand or alchoices hand?
        • Why hand?
        • New book:  The Unplugged Workshop.
  • Where can they find us
    • And, that just about wraps it up for this show.
    • If you’re missing us already, you can subscribe to the show on itunes. Just search for the Modern Woodworkers Association. Once you’re subscribed, you’ll be sure never to miss an exciting episode. While you’re in iTunes, please leave us a 5 star rating. It helps our rank so others can more easily find us.
If you want to find out more about the Modern Woodworkers Association, be sure to visit modernwoodworkersassociation.com, follow the MWA on twitter @MWA_National, like the MWA on Facebook or circle Modern Woodworkers Association on Google+. While you’re there, join the MWA Google+ community for project sharing, discussion and loads of woodworking banter.Dont forget about the +Modern Woodworkers Association  Podcast. We talk woodworking with Guests from around the world of woodworking every other week. Subscribe to the RSS feed or iTunes today.
Read More..

Selasa, 15 Maret 2016

Stephens Step Stool Part I

My son, Stephen, inherited his current bed from his Uncle. It’s a standard twin size mattress with six (6) drawers below it. This leaves the mattress at a height which is a quick hop for an adult to get up onto and a big climb for an eight year old.
Stephens old stool is much the worse for wear.
Since receiving the bed Stephen has used a small stool he made in Nursery School as a step. The stool was a simple project designed for four your olds to assemble. It’s consists of a 12” x 12” piece of ¾” CDX plywood with four (4) 2” x 2” legs attached with two (2) 8d nails each. Frankly, it’s amazing the old stool lasted as long as it did.
Stephen has been struggling to get up into his bed since his old stool broke. When we found ourselves the only ones home one recent afternoon, we headed to the shop and began working on his new stool.
We began by looking at step stools online. Stephen took an immediate liking to Warton Esherick’s library Ladder. As much as I’d like to make one, time was off the essence, so I had to veto that plan. We ultimately settled on a traditional Shaker step stool.
Brian VanVreedes awesome version of Eshericks Library Ladder.
After looking at a few online, I remembered that there was a Shaker step stool in Rough Cut –Woodworking with Tommy Mac. We dug out my copy and used the cut list for overall dimensions and a basic parts list.
For Stephen, that’s where the boring part began, spending an hour feeding boards through the planer and jointer wasnt his idea of a good time.Dont forget about the +Modern Woodworkers Association Podcast. We talk woodworking with Guests from around the world of woodworking every other week. Subscribe to the RSS feed or iTunes today.
Read More..

Sabtu, 12 Maret 2016

Stephens Step Stool Part IV

With the steps and legs joined I turned my attention to the stretchers.
The legs are glued to the steps.
The stretchers are made from the 1" thick stock I milled for the steps and legs during the milling process. I began by ripping two (2) pieces to about 1¼” width.
Next I took two (2) scrap pieces and cut them to be the exact length between the sides, where the sides meet the steps. I fit these pieces between the legs at the base of the stool in order to hold them parallel (they were angled in, so the legs held the spacers under compression without clamps).
With the legs held parallel by the spacers, I used an adjustable square to mark up from the bottom evenly on both legs. I didnt go for a particular measurement. I aimed for about 1/3 of the choice up. The square ensured that the marks on both legs were even with each other. I followed the same process to mark out for the back stretcher, making it about 1½” higher (by eye) than the front stretcher.
The stretcher blanks were laid across the legs, with the bottom edge of the stretchers even with my marks. Then I marked the top of the stretcher on the legs and the inside and outside of the legs on the stretchers. I cut the stretchers to length at the outside edge of the leg marks. Then I used a bevel gauge and laid out a single tail on each end, extending from the inside leg mark to the end of the stretcher. I cut down the side of the tail with my dovetail saw, then I scored the shoulder line with a chisel and cut it with the saw too.
The "pins".
Once the tails were cut, I laid the stretchers back down in place on the legs and marked the pins (it’s really just a single negative tail, but for the sake of clarity, I’ll call it the pins). The sides of the pins were cut with my dovetail saw and I chiseled out down to the base.
Hand cutting dovetails is not an operation I do often, so their fit was gappy. It was nothing a little epoxy wouldn’t fix later.
Not the prettiest, but itll do.
As I had done with the steps and legs, I took the stretchers to the router table and rounded over the edges that I would not be able to reach once the step stool was assembled. Then I glued in the stretchers with NexaBond. Actually, I installed the front stretcher before I remembered I should have rounded it over. This left me more work to do with the rasp and resulted in the back edge not being as evenly rounded as the others. Be sure to round over your unreachable edges before assembly.
For previous Step Stool posts, click here.Dont forget about the +Modern Woodworkers Association Podcast. We talk woodworking with Guests from around the world of woodworking every other week. Subscribe to the RSS feed or iTunes today.
Read More..

Jumat, 11 Maret 2016

MWA Podcast 44 Jeff Miller

This post originally appeared at modernwoodworkersassociation.com
Show Notes:
What’s in the shop?
  • Chris
    • Only used wood named after jungle creatures
  • Dyami
    • Carter Guides
    • The stool is blue & getting glossy
    • The Dyed Timberstrand Chris Mentioned
    • Tom
      • Tom’s wee bench
        • Last minute elf
        Blog post that piqued our interest
        • Nik Brown - The Digital Woodworker
          • A rustic bombproof farmhouse / harvest trestle table for a family kitchen
        • The Wood Whisperer
          • Scott’s Low-Back Chair
        • American Craftsman Workshop
          • and Fine Woodworking - It’s All Related
          Goings on in the MWA
          • Jim Heavey at Infinity cutting tools
          • Main topic
            • Jeff Miller
              • furnituremaking.com
              • Jeff has 7 benches, each outfitted differently
              • One of Jeff’s Books (Dyami’s favorite): Charimaking & Design
              Next broadcast’s topic (12/11/13)
              • Tom Fidgen
              • Fun Fact: Today (12/4/13) is Jim Ashley’s Birthday
                If you’re missing us already, you can subscribe to the show on itunes. Just search for the Modern Woodworkers Association. Once you’re subscribed, you’ll be sure never to miss an exciting episode. While you’re in iTunes, please leave us a 5 star rating. It helps our rank so others can more easily find us.
                If you want to find out more about the Modern Woodworkers Association, be sure to visit modernwoodworkersassociation.com, follow the MWA on twitter @MWA_National, like the MWA on Facebook or circle Modern Woodworkers Association on Google+. While you’re there, join the MWA Google+ community for project sharing, discussion and loads of woodworking banter.
                Dont forget about the +Modern Woodworkers Association Podcast. We talk woodworking with Guests from around the world of woodworking every other week. Subscribe to the RSS feed or iTunes today.
                Read More..

Senin, 07 Maret 2016

This week The Woodpecker makes step stools

Dont forget about the +Modern Woodworkers Association Podcast. We talk woodworking with Guests from around the world of woodworking every other week. Subscribe to the RSS feed or iTunes today.
Read More..

Senin, 29 Februari 2016

There Are Events Afoot

I was hoping to share this on the MWA Podcast this week. Alas, we didnt manage to record an episode (next week and the week after we will). In the mean time, I wanted to be sure to share two (2) great upcoming woodworking events.
Chirs current shop stool.
The first is Chris Wongs Shop Stool Build Off. Chris of Flair Woodworks is building a new shop stool and he has invited everyone to build along with him. You can read more about the build off here, on Chirs site. You can also follow the stool making madness live on twitter on Jaunary 25, 2014. Just follow the hash-tag #SSBO.
Another great event coming up is the Furniture Project, February 21 -23 at the Seaport World Trade Center in Boston. The Furniture Project (formerly the FurnitureExpo) is a great event conceived to introduce custom furniture makers with a buying audience. It shares show space with the New England Home Show.
Each year the Furniture Project chooses a project and invites all furniture makers to make one and enter it for display. Accepted pieces are then shown at the Furniture Project. This year, the project is a Chimney Cabinet. The rules, available here, are minimal and allow for lots of creativity.
Show attendees admire Mortons table.
Jim Ashley, Michael McCoy & Chuck Bender at FurnitureExpo 2012
If youre anywhere near Boston, Id highly recommend attending the Furniture Project and even entering a Chimney Cabinet if you can. Ive attended before and friends such as Morton, Rusty and Rob Bois have displayed there. Its well worth attending.
Dont forget about the +Modern Woodworkers Association Podcast. We talk woodworking with Guests from around the world of woodworking every other week. Subscribe to the RSS feed or iTunes today.
Read More..

Senin, 22 Februari 2016

Stephens Step Stool Part VI

I’ve been wanting to play with dye for a while, so I figured that Stephen’s Step Stool would be a perfect project to experiment with. Before putting any dye on the stool itself, I tested a few dye mixtures on a sample board I had sanded with the stool. I tried General Finishes and TranstintBlue Dyes. While the General Finishes is ready right out of the can, the Transtint needs to be diluted. I tried one dilution with denatured alcohol and one with a .5 lb cut of shellac. All three (3) were ragged onto the sample board.
Three dyes, almost the same coloring.
When they dried, I had a hard time distinguishing them. They all seemed about the same color blue and the small difference there were seemed more to be the wood grain than the dye. I decided on Transtint in shellac since the shellac didn’t raise the grain like the water based General Finishes dye did and unlike the Transtint in alcohol, the Transtint in shellac provided a seal coat at the same time.
The finished dye.
I ended up applying two (2) coats of blue tinted .5 lb cut shellac. The second coat not only made the blue color richer, it also allowed me to rub out streaks and other imperfections in the initial coat. Though the coloring wasn’t perfect it was still really cool and I’m quite pleased with how it came out.
As a finish, I’m applied 4 coats of General Finishes Arm-R-Seal, as per the method Marc describes in his A Simple Varnish Finish DVD. It’s a simple method of rag applying an oil/varnish blend. The results are good and hard to mess up.
The finished stool.
With the finish on the stool went into Stephen’s room and it was time to get to those pesky Christmas projects. Now, what was it I’m supposed to build . . .
For all of the Step Stool posts, click here.Dont forget about the +Modern Woodworkers Association Podcast. We talk woodworking with Guests from around the world of woodworking every other week. Subscribe to the RSS feed or iTunes today.
Read More..

Selasa, 16 Februari 2016

Stephens Step Stool Part II

I made Stephen’s Step Stool from Douglas Fir. Our big box stores do not carry the fabled Southern Yellow Pine, so I settled on our local (not-so)equivalent.
I laid out the parts between the knots on the boards and cut them using my jig saw. Because the 2”x12”s were 10’ long, I cut them on the floor using scraps of wood to hold them up and provide blade clearance.
The 2” x 12” we used was wider than my 8” jointer so I flattened the faces with the planer alone. Once each piece was cut to length there was minimal bowing. The pieces were first fed through my planer with their concave side down. They were then continually passed through the planer, alternating faces between passes, until the board where reduced from 1½” to 1” thick.
Stephen proved a great help during the milling as he was able to keep an eye on the ClearVue cyclone attached to my shop vac and let me know when it began to clog. Planing ½” of thickness off of 11½” wide boards made about 45 gallons of chips.
After thicknessing the boards I finished milling them by flattening one edge on the jointer and then cutting to width on my table saw. Once milled and dimensioned we stickered them and called it a night.
Dry fitting before joinery.
The following day I cut the dovetails using my Keller 2200 Journeyman Dovetail Jig. Some of the boards had cupped slightly, but I was able to clamp them up tightly and the dovetails cut reasonably well.
Milling the pins.
Then I glued the front and rear sections of each side together using Nexabond glue. Since using it in my clamp rack I’ve been impressed with Nexabond’s performance. Hopefully +Christopher Adkins will mail me my WIA Nexabond soon.
While the glue on the sides dried, the remaining pieces spent the night re-stickered.Dont forget about the +Modern Woodworkers Association Podcast. We talk woodworking with Guests from around the world of woodworking every other week. Subscribe to the RSS feed or iTunes today.
Read More..

Jumat, 12 Februari 2016

Stephens Step Stool Part III

When I removed the sides from their glue up, I found that the left side had cupped slightly.
I took all of the unassembled pieces, both cupped and flat, and sanded them to 220. This may have been overkill as I still hand plenty of post assembly sanding to go, but I wanted to make sure that I didnt have to do any initial smoothing after the stool was assembled.
I pre-routed the edges I wouldnt be able to reach after assembly.
When the pieces were sanded, I marked out the edges I wouldnt be able to reach with a router after assembly and rounded them over with a ¼” radius round over bit. I was careful to keep well achoice from the joinery. This meant that there would still be rounding and smoothing to do by hand after assembly. That’s the price of ensuring that the joinery wasnt damaged and that rounded edges on the assembled pieces flowed together properly.
Unfortunately I only had time for sanding and I wasnt able to assemble the stool. The pieces spent one more night stickered.
By the time I was ready for assembly, this side had cupped severely.
The following day, when I finally did get to assembly, I found a wicked cup in the left side. After thinking about it for a few minutes I dug out my Woodpecker Aluminum Camping Cauls and used two (2) to force the left side close to flat.
The cauls forced it into almost flat.
Close to flat wasnt exactly flat and the boards hadnt been exactly flat when I dovetailed them either. This resulted in the assembly of the dovetails requiring a little quick paring and some additional persuading with a large rubber mallet. I used Tightbond III in the dovetails for its open time and clamped them up overnight.
All glued up.
In the morning, the tear out from the last minute tail adjustment was obvious.Dont forget about the +Modern Woodworkers Association Podcast. We talk woodworking with Guests from around the world of woodworking every other week. Subscribe to the RSS feed or iTunes today.
Read More..

Sabtu, 06 Februari 2016

New video posted Lets build a step stool!