Tampilkan postingan dengan label can. Tampilkan semua postingan

Minggu, 03 April 2016

Stephens Step Stool Part V

With the entire step stool now glued up I realized I hadn’t cut feet yet. I took my Lee Valley Drawing Bow and marked out a subtle curve in the middle of each leg. Once I cut out the curve with a jig saw, it left two (2) feet on each leg.
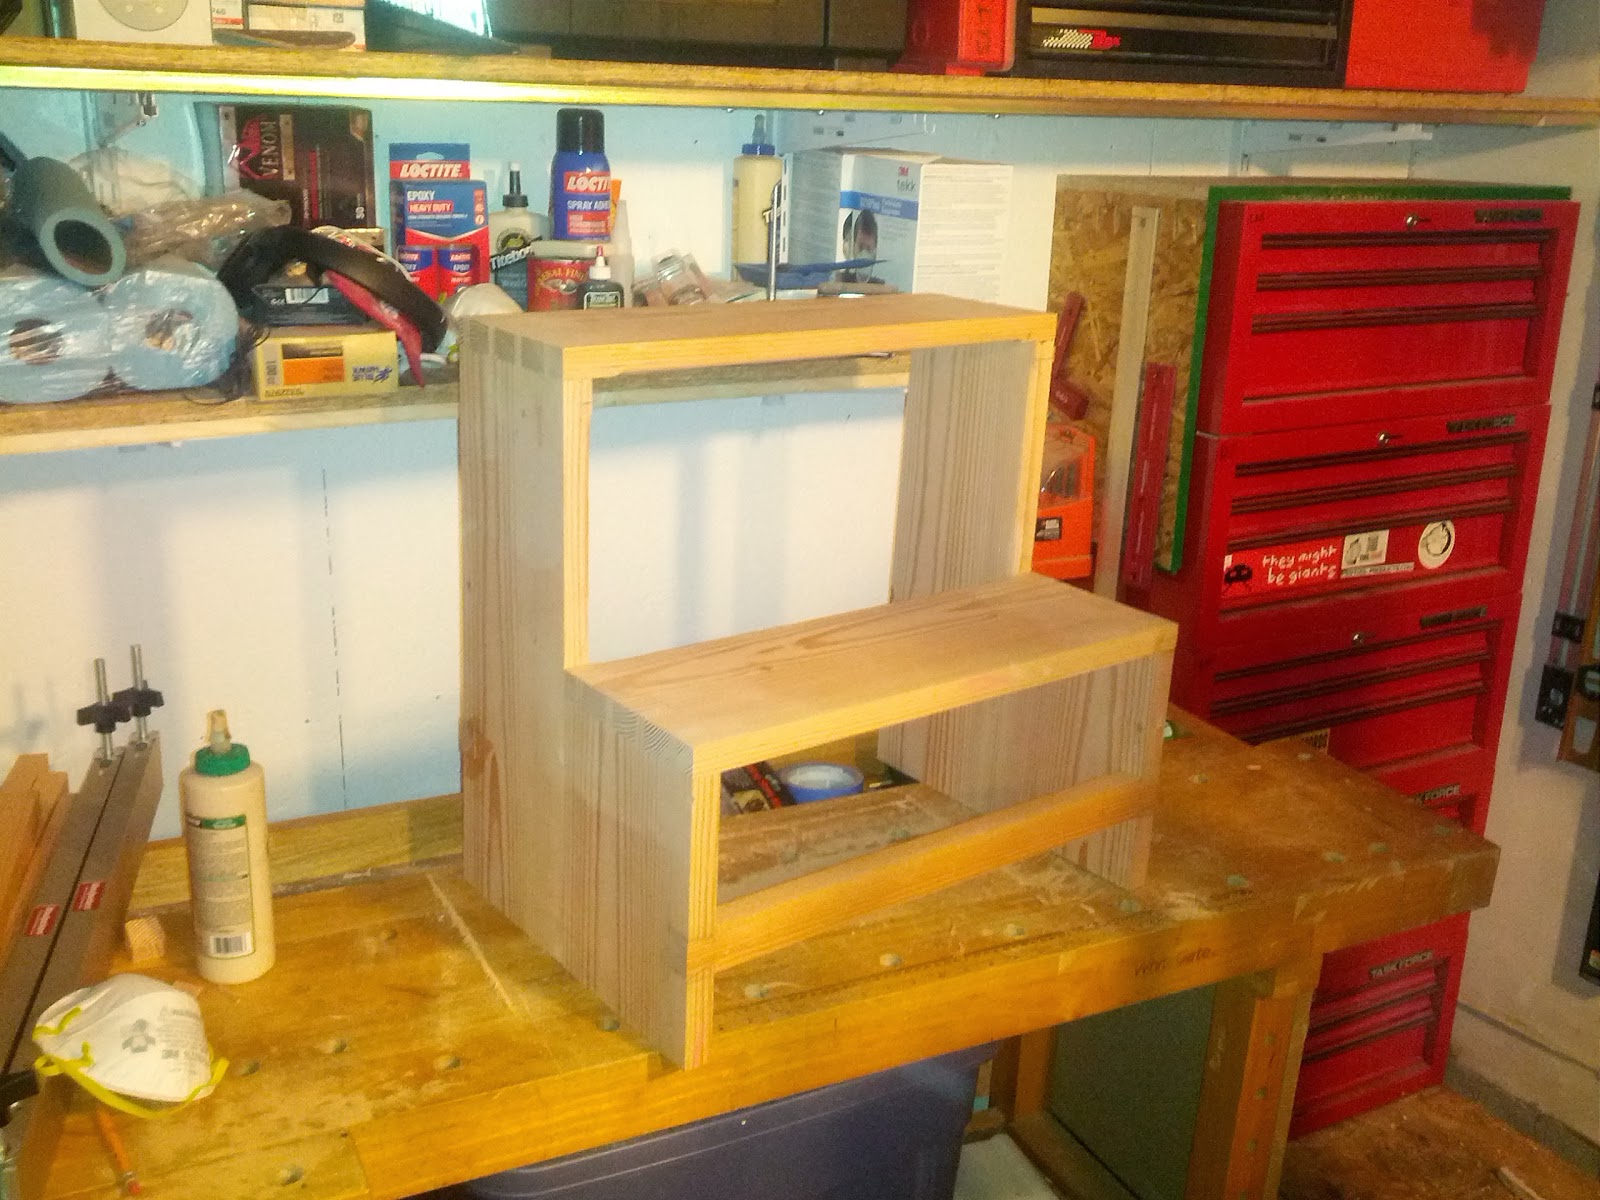
All ready for  feet.
Now with feet I took the step stool over to my router table. After the nasty incident with my neighbor during this stage of my last project, I setup my router table inside this time.
I removed the fence and used a bearing guided ¼” radius roundover bit, I ran every reachable edge of the stool (except the bottom) over it. This method took a bit of getting used too. With a bit of practice I soon found it easy as the stool is not so big as to hang completely off the router table yet is big enough to provide plenty of reference and holding surface.
Its starting to look curved.
Fresh off the router table the stool (or any piece having this roundover method used) is rounded, but not done. The routed curves on the edges are hard, disjointed and where they do flow into each other they have a shallow, machine cut look. I only use the router to hog off most of the waste, not to provide my final edges. After routing it is time for rasping.
My arsenal (and some additional).
As I’ve grown to enjoy the process and results of using rasps, my collection of rasps has grown. As I’ve used them more and more, favorites have emerged and others have fallen out of use. On Stephen’s Step Stool I did all my initial rasping using my Shinto 9” rasp. Though amazingly cheap, the woven blade is exceptional at coarse and medium rasping with efficient chip removal. Unlike other cheap rasps I’ve used, the Shinto does not leave tooth tracks (due to the woven blade).
The Shinto is wonderful at coarse work.
Next I used my Auriou #9 Cabinet Makers rasp. The Auriou further refines the curves while taking the coarse surface left by the Shinto and smoothing it to a much more consistent surface. Finally I used my new Gramercy 5” 25 tpi cabinet makers rasp. This Gramercy is delightfully light and leaves a very smooth surface (for a rasp).
With all the rasp work I do my goal is to further refine and flair the curves. I want them be organic, flowing and invite touch.
As transformative as the rasps are, even fine rasps leave a surface too coarse for finish. When I’m done with the rasps I switch to my Rotex sanders. I use an RO 125 and an RO 90. When setup on Rotex mode with an 80 or 120 grit sanding pad and set to speed 1, they do a wonderful job of removing the rasping marks. They also use the Festool Interface pads which allow the sanders to wrap the rounded edges and prevent flattening.
Gaps? What gaps?
After sanding the curved edges I added blue Transtint dye to 5-minute epoxy and filled in the few big gaps in the dovetails. Once the epoxy was dry I took out the sanders again, this time sanding the entire stool. I currently sand up through 220 grit, though I’m not completely satisfied with my sanding results. I’m not sure what changes I’ll make, but I’m considering going much higher in grit.Find all of the Step Stool posts here.
Dont forget about the +Modern Woodworkers Association Podcast. We talk woodworking with Guests from around the world of woodworking every other week. Subscribe to the RSS feed or iTunes today.
Read More..

Selasa, 22 Maret 2016

MWA Podcast Episode 24 Scott Meek


MWA Podcast Episode #24 - Scott Meek

MWA Podcast Episode #24 - Scott Meek (60:30)

Read More..

Selasa, 15 Maret 2016

2013 March Shop Tour

March is now upon us. And with it, another monthly shop tour.
The Ghetto WorkCenter Boom Arm built last month is now stored on the wall.
While I conceived of the monthly shop tour series as a choice of documenting the progress Im making on the shop, the March tour is unfortunately a documentation of my lack of progress since the previous tour. About the only thing I managed to do in the shop since the February tour was the preparation of 8 birdhouses which my sons Cub Scout den assembled last week.This lack of shop progress is to be expected as life often gets in the choice. What are we to do? Just keep our heads down and steal some shop time when we can. Hopefully your last month in the shop was productive.
Read More..

Kamis, 10 Maret 2016

Cancer Can Suck It

+Marc Spagnuolo does many generous and great things for the woodworking community. As much as I like the Wood Whisperer Guild, Wood Talk and the Wood Whisperer site itself, the most important thing Marc has done is Woodworkers fighting cancer.
Read More..

Jumat, 26 Februari 2016

An Alternative To Tin Can Carts Part II

Once the pieces were cut to size and shape with a combination of track saw, table saw and miter saw. To cut the handles, I first drilled out each end using a hole saw, then I connected them with the jig saw. The bottoms and can retaining pieces first had their curved outer corners cut with jig saw. They were then refined on an oscillating belt sander. Finally the can holes were cut with a hole saw.
Lots of Caddy pieces.
It was at this point that I realized that I had cut the bottoms as two (2) pieces which would have the handle between them. Unfortunately, I cut the handles to fit on top of a single bottom piece. Once I realized this, I then cut and fabricate new bottoms to make up for it. Two (2) of the mistaken bottom pieces were used to make additional can retaining pieces. With an additional handle and bottom, this allowed me to make four (4) rather than three (3) can caddies.The next step was to cut out for the cans. I accomplished with with a hole saw. In order to hold the pieces still, I made an impromptu jig with scrap plywood. I placed each piece against the jig, and then used a single clamp to lock it in place. I powered the hole saw with my old Milwaukee ½” drill. This was the first power tool I received as a gift when I bought my first house. I can’t say I use it often, but when I do, I’m reminded what a nice drill it is.
The old Milwaukee is a workhorse.
The jig held two faces of the parts. A single clamp locked them in.
The clamp in the background hold the jig to the bench.
The hole saws left a bit of burning on the inside edge of the can holes, so I next took the can retaining pieces over to the oscillating spindle sander and cleaned up the inside of each hole. Unfortunately, I lost hold of one (1) of the pieces while doing this, and managed to break the fence lock-down nut on the sander. Shame on me for leaving it in place.
Be carefull of spinning can retaining pieces.
Now that all the pieces were completely cut to size and shape, I took out my trim router and put an ?” roundover on all the outside edges and the can holes and handle. ?” isn’t much, but I find it’s just right for easing a hard edge without making it too soft (especially in ½” material).
A simple 1/8" roundover makes the edges much friendlier to touch.
In order assembly the tin can caddies, I used 4mm Dominos to joint the bottom and can retaining pieces to the handle. Since the Dominos penetrated in more than ¼”, I ofsett them relative to each other so that the Dominos of each can retaining piece wouldn’t hit the opposite one in the handle.
Setting the Domino against a fence is an easy choice for accurate joinery.
Lots of parts and lots of Dominos.
For glue-up, I simply used parallel clamps. I left the Dominos to keep the parts square. They did a pretty good job of this. All of the tin can caddies look square to the eye and are certainly close enough when put against an actual square.
The Dominos were all it took to keep the pieces square.
For the finish, I wanted to try something new (to me). I use boiled linseed oil. While I’ve heard many things about how heating your BLO allows it to penetrate better, I simply followed the instructions on the can and cut it 2 to 1 with mineral spirits. I then applied it heavily with a rag, and kept applying to keep it wet for 15 minutes. Then I wiped it off and let the tin can caddies dry. I’m still on the fence about how I feel about BLO as a finish, but for this project it was certainly a success. The tin can caddies have a nice warm tone to them.
The BLO sample is to the left (almost faded out by the flash).
The finished Tin Can Caddies.
With the caddies done, it’s now up to my wife to decorate some cans and give them to her crafting friends.An Alternative To Tin Can Carts: Part I
Read More..

Sabtu, 13 Februari 2016

An Alternative To Tin Can Carts Part I

My wife is a crafter . . . she’s crafty? . . . she makes things and shops at Michael’s.Before Christmas she pinned a tin can caddy on Pinterest and asked me if I could make some. She planned to decorate some tin cans for her crafting friends to use as storage and organizers. The caddy would allow them to take the cans to scrap booking parties and  the like. Of course I accepted the challenge and set about looking at the tin can caddy my wife had pinned.
The caddy on Pinterest has six (6) cans arranged in two (2) rows. Three (3) on each side of the center plywood handle. Based  on the photo, it wasn’t entirely clear how the cans are attached to the center handle. My guess is  either short screws near the top or glue.When I discussed the can attachment issue with my wife, I explained that I didn’t think a single short screw near the top would be good enough (especially as it would allow the cans to twist and the screws would work loose). I broached the idea of embedding magnet in the center so the cans would be removable. This was vetoed, but the idea of removable and swappable cans appeal to my wife. I finally settled on having a bottom to support the cans and a top ring to keep the cans attached to the handle.
My design would be made from ½” Baltic Birch plywood. Each Can Caddy would have a center handle piece, a single bottom which would run under the handle and extend out on both sides and two (2) upper can retaining pieces (1 on each side).
The original caddy.
Laying out the height of the can retaining piece.
I began by taking out a can and using it as a reference. By marking it out full scale on my bench, I figured out that ½” would be a good spacer between cans and for the width of the bottom and upper pieced to extend out beyond the cans. I simply held my hand above the can and determined how much higher the handle piece should be and where the handle opening should be.
Layout of the bottom with the curved corners.
Designing the upper can retaining pieces came next. I laid out the centers of each can cut out. I also used a compass to mark the curves at the outside corners, which were centered at the outside can centers.
The bottom would be the same shape as the upper can retaining pieces without the can cutouts.
With the design done, it was time for batch fabrication.
Read More..