
To finish the Quilt Rack I first installed a pan head screw in the bottom of each foot point to hold it just above my protected table saw surface and allow me to easily finish it without resting the foot on wet finish.
 |
| This choice the wet finish doesnt stick to the drop cloth. |
Since I was short for time and only ended up with one day to apply finish, I used Bull’s Eye Sealcoat shellac. With the help of Kenneth’s great Woodshop Widget app, I was able to mix up .5 lb and 1 lb cuts of shellac (it’s a 2 lb cut in the can).
 |
| Shellac, post cutting, ready to be applied. |
First I applied two (2) coats of .5 lb cut and then 10 of 1 lb cut. I spaced the coats about an hour apart and applied them all with a rag. Between the first few coats I sanded with 00 synthetic steel wool to get the rough spots out. After the final coat, I rubbed it out with 0000 synthetic steel wool.
 |
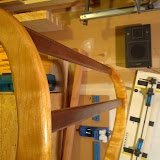
| As the coats went on, the "flame" really began to show. |
I managed to finish it by about 9:30 the night before the party. This meant I was actually around the day of to help instead of being holed up in the shop frantically trying to finish. The quilt rack was a wonderfully received surprise. I’m happy to say it made my mother-in-law the envy of all the old quilting ladies in attendance. In fact, the quilt rack was received so well, I’ll be making a second one for my wife’s aunt this fall.
 |
| A poor photo of the beautiful finished quilt rack. |
 |
| The formal presentation, tears from the recipient and fondling by the other sewers in attendance. |
 |
| The quilt rack in its new home. |


0 komentar:
Posting Komentar