
It was in the summer of 2008 that I ripped out the sheet rock, insulation and electric from my shop. Though I had every intention of replacing them all quickly, it was not to be. For years I suffered through a shop that had no insulation and almost no electric. My only shop outlet was a single 15 amp outlet on a circuit shared with the shop lights and the hall in the house.
As the removal of the insulation and electric was part of the first phase of my siding project, their replacement languished as the siding project devolved into a multi-year odyssey. It was my friend, +Aaron Marshall, who finally brought me back to the insulation and electric.
Woodworking in America 2011 occurred during the early days of the Wood Whisperer Guild Split-Top Roubo project. Aaron and I were excited about it and talking about workbenches. I explained to Aaron my intention to build a Roubo/21st Century Workbench hybrid from LVL’s and Timberstrand. Though the great hardware available from the WIA vendors was tempting, Aaron convinced me to make even that from LVL and make my own leg vise.
I left WIA excited about my bench and proceeded to begin work on it right achoice. I had finished the leg vise design by the time the temperature dipped - that’s when I knew the bench had to wait and I began rebuilding the wall.
 |
| My absolute favorite drill for roughing in electrical work. |
Though the rough in of the electric was the first phase, most of the electrical work had to wait until the walls were insulated and sheathed. The insulating work began just after Christmas 2011 and by April of 2012, I was able to begin sheathing the walls. Finally, by April of 2013, the insulation and sheathing work were done and I was able to begin wiring outlets.
 |
| Ready for sheathing. |
I completed the wiring of the 110V outlets on July 10, 2013. After thinking I was done, finding one I forgot, installing it and then connecting a ground that I’d failed to connect, all of the outlets were live and wired properly. I was even able to use the power detector I made in 7th grade technology to test the outlets.
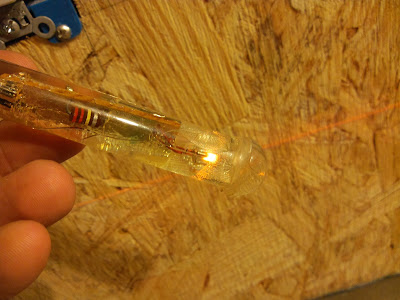 |
| Theres Power! |
Next time I’m in the shop I won’t be swapping plugs to switch tools or blindly feeling for the circuit breaker when the table saw or planer trips the fuse and the lights go out. I now have 3 dedicated 20V circuits with 16 double gang boxes and one single gang box to choose from.
 |
| So many nice outlets . . . |
And that’s with just one side done. Once I wire the opposite wall and connect the two 220V circuits still not setup I hope to have more outlets and power than I can use.
Read More..
Paul Sellers position is that of a snob (and I think, working against the growth of woodworking). You can read for yourself here:I am still very concerned about children in woodworking issue. Yesterday I saw two girls and one boy in the whole show and only a handful of women. That is no fault of the show,me or the other vendors. I think this is directly attributed to machine manufacturers who do indeed hog the market and have nothing to offer to balance out the problem. Since machines dominate the market of woodworking and in fact invade sanity at every level, we will never see this change. No one seems to be responsible for bringing about change and so the problem goes on. Eventually this situation will be sealed and woodworking could one day become a machine only form of making and no longer a craft.
This next comments will indeed get me in deep, deep water. You cannot use a machine to work wood and call it Woodcraft. The machine substitutes for the very thing we call skill and art, but it cannot replace it. Anyone that says a machine is a tool can never understand the art and craft of woodworking. As long as we think and express this, we will never see children and women in the wood shop working with their hands.
If you’d like to read the full post, or check out Paul’s entire site, you can here. |
The children who were captivated by Chuck Benders hand cut dovetails
when the Woodworking Shows visited Somerset, NJ were apparently
not in attendance when the shows hit Tampa. |
In those closing paragraphs to his 3/16/13 blog entry, Paul says a lot.- He says woodworking “could one day become . . . no longer a craft.”
- He says that its not the Woodworking Show’s fault, his fault or other vendors fault that he didnt see more children at the Woodworking Shows (though Ive heard from others there were many children). He says it’s the machine manufacturers fault that there are so few women and children in attendance.
- He says that since machines are dominating the market and invading sanity and as long as this occurs things will never change.
- He says “You cannot use a machine to work wood and call it Woodcraft.”
 |
Itll come as a disappointment that this beautiful chandelier is not woodcraft.
I hope no ones told Todd yet. Hell be sad. |
Thankfully, I’m not the only (or even the first) to call Paul out on what he’s said. In her blog post, Megan Fitzpatrick, the Editor of Popular Woodworking Magazine put it this choice:There are many more examples to which I could point – but that would distract from my assertion that woodworking teachers and writers (and editors) perform a massive disservice to the craft by perpetuating a hard line between hand-tool woodworking and power-tool woodworking. And I find it breathtakingly arrogant (and irresponsibly divisive) to state that only by using hand tools can we call it woodcraft.
Machines have eradicated many of the barriers for all people to enjoy woodworking – particularly for those new to the craft (whom, as you imply, Paul, we need to cultivate). In some cases, machines lower the skill level and physical strength required to build something. In addition, machines used to fabricate tools (both hand and power) make those tools affordable to the home woodworker.
I’m glad that we have prominent woodworkers, woodworkers with soapboxes, who promote the craft and don’t discriminate based on method. Megan does more for the craft in her rebuttal to Paul than any hand or power tool does. Tom Iovino is rallying everyone around getting the next generation started with Get Woodworking Week. Matt Kenney proudly proclaims that there is no cheating. Marc Spagnolo just want’s everyone to learn to build. Todd Clippinger constantly asks, “why arent you in your shop?”These friends, and many, many others, practice a craft known as Woodcraft. They also help teach it to newcomers and spread the joy it entails.
 |
After all the work that went into it, I was disappointed to learn this
book stand wasnt woodcraft. |
Hopefully I’m helping too. I did think long and hard about it, and I know that my recent suggestion to a beginning woodworker that he use pocket screws instead of hand cut mortise and tenons would fall under Paul’s wrath. I also know my advice provides a much lower barrier to entry and will get completed projects under my friend’s belt. Diving right into hand cut joinery would likely just result in frustration.To Paul’s snobbish claims, I say a machine is a tool. I use tools and practice Woodcraft. I know that to be true.Since Paul spreading his snobbery instead of Woodcraft as of late, I’ll leave the last word to Megan.Tools don’t build things; people build things.
And statements such as Paul’s help to build nothing.
Editor’s Note:It has been brought to my attention that Paul’s statements are opinion, and opinion should not be treated as fact. While I agree with this, I feel that simply dismissing Paul’s statements as opinion gives him a pass for the the weight his opinion carries (given his position in the woodworking community) and harm I feel it does to the community.
My sister recently bought a used table on Craigslist but it only came with 3 chairs so she asked me to make her one. Her only request was that it be 17" tall and flat black to match the other chairs. I did some looking around on the web and found the traditional 5 board bench design. I also found Charles Neils video on YouTube and figured that I could build a variation on that design. It also gave me an excuse to try out the new bandsaw. You can download a free sketchup file of this project in the downloads section of this site and you can also watch a video of me building it here: http://youtu.be/1_hz2n7v9ss
I started by cutting the legs to rough length using my little cordless saw. I dont feel safe cutting
pieces that long on my contractor table saw.

I then cut them to length and width on the tablesaw.

Here are all the pieces cut to size. There is 1 extra 1x6 in this picture because I was originally
going to put a support shelf under the seat but the legs are slightly bowed and it didnt match
up when I cut the shelf straight so I decided not to use it.

I used 1 of the side aprons to mark the notches on the legs.


This notch will be cut out and the side apron will rest in it.


I then marked in 3" on the other end of the board for the width of the bottom leg.

I marked the center of the board at 5" to drill a hole later.

I then glued the aprons to the top pieces.

I drilled out a 1 1/4" hole at that 5" mark. It is recommended that you drill a hole rather than just cut a "V" there so that the board doesnt split later on.

I then drew a line from each side of the hole down to the 3" mark that I made earlier.

An d cut the shape out on the bandsaw. You could just as easily made these cuts with a jigsaw.

The legs are slightly bowed so I marked them to have the rounded side facing out.

I used the scrap pieces from the legs to make some blocks to glue in later.

I used my little sanding wheel on the drill press to smooth the inside of the legs. I found this one at
Lowes for under $10.

I then rounded over all the sides not getting glued to something else.


I sanded everything before assembly. I also only sanded it to 120 because I am going to paint it.

I clamped it up to see what it was going to look like.

I used a scrap piece of 2x4 as a spacer for the ends.

I glued the legs to the top/apron pieces and then made sure that they were square before clamping them up.

Here are those block that I cut out earlier.

I took it out back and spray painted it flat black.

I sanded the whole thing with 220 to smooth it out and also gave it some distressing to make it
look a little older. Im not a big fan of over distressed projects so I tried to keep a
semi-light touch.


This was my first time using satin poly. Ive only used gloss up to this point.

I ended up putting 4 coats on the top and aprons and 3 coats on everything else including the underneath. I also put some felt feet on it but forgot to take pictures.
?


